Friday, 19 June 2015

Phantomjs Server For Google Crawling, Facebook And Twitter Share in AngularJS website

PhantomJS server code:
/phantomserver/server.js (this file contain server code)
var server = require('webserver').create(),
system = require('system'),
fs     = require('fs'),
port   = system.env.PORT || 8083;


function parseGET(url){
  var query = url.substr(url.indexOf("?")+1);
  var result = {};
  query.split("&").forEach(function(part) {
    var e = part.indexOf("=")
    var key = part.substr(0, e);
    var value = part.substr(e+1);
    result[key] = decodeURIComponent(value);
  });
  return result;
}

var domainName = "http://www.test.com";

var service = server.listen(port, function(request, response) {
//console.log(encodeURI(request.url));
var url = domainName+request.url;
//var queryString = parseGET(request.url);
//console.log(url);

if(request.method == 'GET' && url){
//var url = queryString.url;
var tempUrl = url.replace(domainName,"");
var tempDirArr = tempUrl.split("/");
var fileName = tempDirArr.pop();
var tempStr ="/temp/snapshot";
if(tempDirArr.length>0){
for(i=0;i<tempDirArr.length;i++){
tempStr = tempStr+"/"+tempDirArr[i];
if(!fs.isDirectory(tempStr)) {
fs.makeDirectory(tempStr);
}
}
}
var dirPathFinal = tempStr;
var filePathFinal = dirPathFinal+"/"+fileName+".html";
console.log(filePathFinal);

if(fs.exists(filePathFinal)) {
var content = fs.read(filePathFinal);
response.statusCode = 200;
response.setHeader("content-type","text/html; charset=UTF-8");
console.log("response sent from file");
response.write(content);
response.close();
} else {
request_page(url, function(properties, pageContents){
response.statusCode = 200;
response.setHeader("content-type","text/html; charset=UTF-8");
console.log("response sent after generation");
content = pageContents.replace(/<script\b[^<]*(?:(?!<\/script>)<[^<]*)*<\/script>/gi,"");
content = content.replace(/<style id="_vis_opt_path_hides" type="text\/css">([^<]*)<\/style>/gi,"");
fs.write(filePathFinal, content);
response.write(content);
response.close();
});
}

} else {
response.statusCode = 404;
response.setHeader('Content-Type', 'text/html; charset=utf-8');
//response.write(fs.read('index.html'));
response.close();
}

});

if(service) console.log("server started - http://localhost:" + server.port);

function request_page(url, callback){

var page = new WebPage();
page.clipRect = { top: 0, left: 0, width: 700, height: 400 };
page.viewportSize = { width: 700, height: 400 };

page.onLoadStarted = function () {
console.log('loading:' + url);
};

page.onLoadFinished = function (status) {
console.log('loaded:' + url);

var properties = {};

properties.title = page.evaluate(function () {
return document.title
});

properties.links = page.evaluate(function () {
return Object.keys(
[].reduce.call(
document.querySelectorAll('a'), 
function(memo, a){
if(a.protocol.indexOf('http') === 0) memo[a.href] = true;
return memo;
}
,{})
)
});

properties.link_areas = page.evaluate(function () {
var sizes = [].reduce.call(document.querySelectorAll('a'), function(memo, a){
var bb = a.getBoundingClientRect(),
area = bb.width * bb.height,
href = a.getAttribute('href');
 
// update the map
if(area){
memo[href] = (memo[href] || 0) + area;
}
 
return memo;
},{});

return Object.keys(sizes).map(function(url){
return [url, sizes[url]];
});
})

setTimeout(function(){
callback(properties,page.content);
page.close();
},10000);
};

page.open(url+"?nosocial=1");

}


//Shell script which run server in background (phserver.sh)
echo `phantomjs /opt/deployment/popkorn/phantomserver/server.js`
Files:
server.js : phantomjs server code which generate html page runtime. it runs on 8083 port
phserver.sh : this file run phantomjs server, it will be called from supservisor
Supervisor configuration:
[program:phantom_server]
command=sh /phantomserver/phserver.sh &;
user=username
Processes which should keep running
node /usr/bin/phantomjs /phantomserver/server.js
$/usr/lib/node_modules/phantomjs/lib/phantom/bin/phantomjs /phantomserver/server.js
Apache redirection configuration
we used ProxyPassMatch for it
Redirect to particular folder, so that it can be matched by pattern (ProxyPassMatch) and served by proxy server
RewriteCond %{HTTP_USER_AGENT} ^facebookexternalhit [OR]
RewriteCond %{HTTP_USER_AGENT} ^Twitterbot [OR]
RewriteCond %{QUERY_STRING} _escaped_fragment_=$
RewriteRule (.*) /snapshot/$1.html? [END]
RewriteRule (.*) /escfrg/$1? [L,P] #P flag is used for proxy redirection
Proxy server redirection
ProxyPassMatch /escfrg/(.*) http://localhost:8083/$1
ProxyPassReverse /escfrg http://localhost:8083/$1

Wednesday, 17 June 2015

Check File size in ubuntu

du -h <filename>

Creating upstart script

Upstart scripts have to placed at /etc/init/, ending with .conf.
Basically they require 2 sessions: one to indicate when to start, and another with the command to exec.
The easiest script to start with your sample is:
# myprogram.conf
start on filesystem
exec /usr/bin/java -jar /path_to/program
Of course, created as root under /etc/init/myprogram.conf.
If your script requires more than one command line, use the script section:
# myprogram.conf
start on filesystem
script
    /usr/bin/java -jar /path_to/program
    echo "Another command"
end script
To enable bash completion for your service, add a symlink into /etc/init.d folder:
sudo ln -s /etc/init/myprogram.conf /etc/init.d/myprogram
Then try start and stop it:
sudo service myprogram start

Example
#Name: phantomserver.conf
description "Phantom server for screenshot generation"
author "Sandeep: 17/06/2015"

pre-start script
    echo 'starting service - server.js...'
end script

post-stop script
    echo 'stopped service - server.js...'
end script

start on runlevel [2534]
stop on runlevel [!2534]

exec phantomjs /var/www/html/phantomserver/server.js
respawn

Monday, 15 June 2015

Running a command in background even after terminating terminal

Use screen command

1. Open screen which is already running
screen -dRR

2. Running a screen with name
screen -S <screenname>

3. Open already running a screen with name

screen -r <screenname>

4. Exit from screen


ctrl+A+D

5. Terminating screen
ctrl+D

Wednesday, 10 June 2015

Upload a file from local to server using ssh

scp <local-file-name-with-path> <user>@<server-ip>:<server-directory-absolute-path>
ex.
scp /var/www/html/work/test.tar.gz user@192.168.0.1:/opt/vhosts/htdocs/

Tuesday, 9 June 2015

Set Up Apache Virtual Hosts on Ubuntu

Introduction

The Apache web server is the most popular way of serving web content on the internet. It accounts for more than half of all active websites on the internet and is extremely powerful and flexible.
Apache breaks its functionality and components into individual units that can be customized and configured independently. The basic unit that describes an individual site or domain is called a virtual host.
These designations allow the administrator to use one server to host multiple domains or sites off of a single interface or IP by using a matching mechanism. This is relevant to anyone looking to host more than one site off of a single VPS.
Each domain that is configured will direct the visitor to a specific directory holding that site's information, never indicating that the same server is also responsible for other sites. This scheme is expandable without any software limit as long as your server can handle the load.
In this guide, we will walk you through how to set up Apache virtual hosts on an Ubuntu 14.04 VPS. During this process, you'll learn how to serve different content to different visitors depending on which domains they are requesting.

Prerequisites

You will need to have Apache installed in order to work through these steps. If you haven't already done so, you can get Apache installed on your server through apt-get:
sudo apt-get update
sudo apt-get install apache2
After these steps are complete, we can get started.
For the purposes of this guide, my configuration will make a virtual host for example.com and another fortest.com. These will be referenced throughout the guide, but you should substitute your own domains or values while following along.
We will show how to edit your local hosts file later on to test the configuration if you are using dummy values. This will allow you to test your configuration from your home computer, even though your content won't be available through the domain name to other visitors.

Step One — Create the Directory Structure

The first step that we are going to take is to make a directory structure that will hold the site data that we will be serving to visitors.
Our document root (the top-level directory that Apache looks at to find content to serve) will be set to individual directories under the /var/www directory. We will create a directory here for both of the virtual hosts we plan on making.
Within each of these directories, we will create a public_html file that will hold our actual files. This gives us some flexibility in our hosting.
For instance, for our sites, we're going to make our directories like this:
sudo mkdir -p /var/www/example.com/public_html
sudo mkdir -p /var/www/test.com/public_html
The portions in red represent the domain names that we are wanting to serve from our VPS.

Step Two — Grant Permissions

Now we have the directory structure for our files, but they are owned by our root user. If we want our regular user to be able to modify files in our web directories, we can change the ownership by doing this:
sudo chown -R $USER:$USER /var/www/example.com/public_html
sudo chown -R $USER:$USER /var/www/test.com/public_html
The $USER variable will take the value of the user you are currently logged in as when you press "ENTER". By doing this, our regular user now owns the public_html subdirectories where we will be storing our content.
We should also modify our permissions a little bit to ensure that read access is permitted to the general web directory and all of the files and folders it contains so that pages can be served correctly:
sudo chmod -R 755 /var/www
Your web server should now have the permissions it needs to serve content, and your user should be able to create content within the necessary folders.

Step Three — Create Demo Pages for Each Virtual Host

We have our directory structure in place. Let's create some content to serve.
We're just going for a demonstration, so our pages will be very simple. We're just going to make anindex.html page for each site.
Let's start with example.com. We can open up an index.html file in our editor by typing:
nano /var/www/example.com/public_html/index.html
In this file, create a simple HTML document that indicates the site it is connected to. My file looks like this:
<html>
  <head>
    <title>Welcome to Example.com!</title>
  </head>
  <body>
    <h1>Success!  The example.com virtual host is working!</h1>
  </body>
</html>
Save and close the file when you are finished.
We can copy this file to use as the basis for our second site by typing:
cp /var/www/example.com/public_html/index.html /var/www/test.com/public_html/index.html
We can then open the file and modify the relevant pieces of information:
nano /var/www/test.com/public_html/index.html
<html>
  <head>
    <title>Welcome to Test.com!</title>
  </head>
  <body>
    <h1>Success!  The test.com virtual host is working!</h1>
  </body>
</html>
Save and close this file as well. You now have the pages necessary to test the virtual host configuration.

Step Four — Create New Virtual Host Files

Virtual host files are the files that specify the actual configuration of our virtual hosts and dictate how the Apache web server will respond to various domain requests.
Apache comes with a default virtual host file called 000-default.conf that we can use as a jumping off point. We are going to copy it over to create a virtual host file for each of our domains.
We will start with one domain, configure it, copy it for our second domain, and then make the few further adjustments needed. The default Ubuntu configuration requires that each virtual host file end in .conf.

Create the First Virtual Host File

Start by copying the file for the first domain:
sudo cp /etc/apache2/sites-available/000-default.conf /etc/apache2/sites-available/example.com.conf
Open the new file in your editor with root privileges:
sudo nano /etc/apache2/sites-available/example.com.conf
The file will look something like this (I've removed the comments here to make the file more approachable):
<VirtualHost *:80>
    ServerAdmin webmaster@localhost
    DocumentRoot /var/www/html
    ErrorLog ${APACHE_LOG_DIR}/error.log
    CustomLog ${APACHE_LOG_DIR}/access.log combined
</VirtualHost>
As you can see, there's not much here. We will customize the items here for our first domain and add some additional directives. This virtual host section matches any requests that are made on port 80, the default HTTP port.
First, we need to change the ServerAdmin directive to an email that the site administrator can receive emails through.
ServerAdmin admin@example.com
After this, we need to add two directives. The first, called ServerName, establishes the base domain that should match for this virtual host definition. This will most likely be your domain. The second, calledServerAlias, defines further names that should match as if they were the base name. This is useful for matching hosts you defined, like www:
ServerName example.com
ServerAlias www.example.com
The only other thing we need to change for a basic virtual host file is the location of the document root for this domain. We already created the directory we need, so we just need to alter the DocumentRootdirective to reflect the directory we created:
DocumentRoot /var/www/example.com/public_html
In total, our virtualhost file should look like this:
<VirtualHost *:80>
    ServerAdmin admin@example.com
    ServerName example.com
    ServerAlias www.example.com
    DocumentRoot /var/www/example.com/public_html
    ErrorLog ${APACHE_LOG_DIR}/error.log
    CustomLog ${APACHE_LOG_DIR}/access.log combined
</VirtualHost>
Save and close the file.

Copy First Virtual Host and Customize for Second Domain

Now that we have our first virtual host file established, we can create our second one by copying that file and adjusting it as needed.
Start by copying it:
sudo cp /etc/apache2/sites-available/example.com.conf /etc/apache2/sites-available/test.com.conf
Open the new file with root privileges in your editor:
sudo nano /etc/apache2/sites-available/test.com.conf
You now need to modify all of the pieces of information to reference your second domain. When you are finished, it may look something like this:
<VirtualHost *:80>
    ServerAdmin admin@test.com
    ServerName test.com
    ServerAlias www.test.com
    DocumentRoot /var/www/test.com/public_html
    ErrorLog ${APACHE_LOG_DIR}/error.log
    CustomLog ${APACHE_LOG_DIR}/access.log combined
</VirtualHost>
Save and close the file when you are finished.

Step Five — Enable the New Virtual Host Files

Now that we have created our virtual host files, we must enable them. Apache includes some tools that allow us to do this.
We can use the a2ensite tool to enable each of our sites like this:
sudo a2ensite example.com.conf
sudo a2ensite test.com.conf
When you are finished, you need to restart Apache to make these changes take effect:
sudo service apache2 restart
You will most likely receive a message saying something similar to:
 * Restarting web server apache2
 AH00558: apache2: Could not reliably determine the server's fully qualified domain name, using 127.0.0.1. Set the 'ServerName' directive globally to suppress this message
This is a harmless message that does not affect our site.

Step Six — Set Up Local Hosts File (Optional)

If you haven't been using actual domain names that you own to test this procedure and have been using some example domains instead, you can at least test the functionality of this process by temporarily modifying the hosts file on your local computer.
This will intercept any requests for the domains that you configured and point them to your VPS server, just as the DNS system would do if you were using registered domains. This will only work from your computer though, and is simply useful for testing purposes.
Make sure you are operating on your local computer for these steps and not your VPS server. You will need to know the computer's administrative password or otherwise be a member of the administrative group.
If you are on a Mac or Linux computer, edit your local file with administrative privileges by typing:
sudo nano /etc/hosts
If you are on a Windows machine, you can find instructions on altering your hosts file here.
The details that you need to add are the public IP address of your VPS server followed by the domain you want to use to reach that VPS.
For the domains that I used in this guide, assuming that my VPS IP address is 111.111.111.111, I could add the following lines to the bottom of my hosts file:
127.0.0.1   localhost
127.0.1.1   guest-desktop
111.111.111.111 example.com
111.111.111.111 test.com
This will direct any requests for example.com and test.com on our computer and send them to our server at 111.111.111.111. This is what we want if we are not actually the owners of these domains in order to test our virtual hosts.
Save and close the file.

Step Seven — Test your Results

Now that you have your virtual hosts configured, you can test your setup easily by going to the domains that you configured in your web browser:
http://example.com
You should see a page that looks like this:
Apache virt host example
Likewise, if you can visit your second page:
http://test.com
You will see the file you created for your second site:
Apache virt host test
If both of these sites work well, you've successfully configured two virtual hosts on the same server.
If you adjusted your home computer's hosts file, you may want to delete the lines you added now that you verified that your configuration works. This will prevent your hosts file from being filled with entries that are not actually necessary.

Adding sudo user in ubuntu

Add new user

adduser <username>

Adding user to sudo group

gpasswd -a <username> sudo

Installing MongoDB

Import the MongoDB repository's public key.
sudo apt-key adv --keyserver hkp://keyserver.ubuntu.com:80 --recv 7F0CEB10
Create a list file for MongoDB.
echo 'deb http://downloads-distro.mongodb.org/repo/ubuntu-upstart dist 10gen' | sudo tee /etc/apt/sources.list.d/mongodb.list
Reload the local package database.
sudo apt-get update
Install the MongoDB packages:
sudo apt-get install -y mongodb-org
Notice that each package contains the associated version number.
Once the installation completes you can start, stop, and check the status of the service. It will start automatically after installation.
Try to connect to the MongoDB instance running as service:
mongo
If it is up and running, you will see something like this:
MongoDB shell version: 2.6.9
connecting to: test
Welcome to the MongoDB shell.
For interactive help, type "help".
For more comprehensive documentation, see
    http://docs.mongodb.org/
Questions? Try the support group
    http://groups.google.com/group/mongodb-user
This means the database server is running! You can exit now:
exit

How To Install a MEAN.JS Stack on an Ubuntu 14.04 Server

Introduction

MEAN.JS is a full-stack JavaScript development solution that pulls together some of the best JavaScript technologies so that you can get applications into production quickly and easily. MEAN.JS consists of MongoDB, ExpressJS, AngularJS, and Node.
In this guide, we will install each of these components onto an Ubuntu 14.04 server. This will give us the applications and structure we need to create and deploy MEAN apps easily.

Prerequisites

To begin this guide, you will need to have access to an Ubuntu 14.04 server.
You will need a non-root user account with sudo privileges to correctly install and configure the components we will be working with.
When you are finished with the initial configuration of your server, log in with your non-root user and continue with this guide.

Download and Install MongoDB and Dependencies through Apt

Throughout this guide, we will be installing software using a number of different techniques depending on each project's requirements. The first set of installations will use apt, Ubuntu's package management system.
Before we can begin installing software, we will be adding an additional repository with up-to-date MongoDB packages. This repository is provided by the MongoDB project itself, so it should always have recent, stable versions of MongoDB.
First, we must add the MongoDB team's key to our system's list of trusted keys. This will allow us to confirm that the packages are genuine. The following command will add the correct key to our list (if you wish, you can verify the key ID through MongoDB's official documentation):
sudo apt-key adv --keyserver hkp://keyserver.ubuntu.com:80 --recv 7F0CEB10
Now that we trust packages signed by the MongoDB maintainers, we need to add a reference to the actual repository to our apt configuration. We can create a separate file that will be sourced by apt with the correct repository reference by typing:
echo 'deb http://downloads-distro.mongodb.org/repo/ubuntu-upstart dist 10gen' | sudo tee /etc/apt/sources.list.d/mongodb.list
Our system is now configured with the new MongoDB repository. We can update our system's local package cache so that it knows about the new packages, and then we can install the software we need.
We will be installing MongoDB packages to use as our database, git to help us with later installations, and some packages that we will need as dependencies and build dependencies for Node:
sudo apt-get update
sudo apt-get install mongodb-org git build-essential openssl libssl-dev pkg-config
Once the installation is complete, we can move on to building Node.

Download, Build, and Install Node from Source

Node is a very fast-moving project that cuts releases frequently. In order to get an up-to-date copy of Node, built to run on our specific system, we will be downloading the most recent source and compiling the binary manually. This is a rather straight forward procedure.
First go to the download section of the Node website. In the main section of the page, there are download links separated by operating system, as well as a link for the source code in the upper-right corner of the downloads:
Node source code link
Right-click on the source code link and select "Copy link address" or whatever similar option your browser provides.
Back on your server, move into your home directory and use the wget command to download the source code from the link you just copied. Your Node source URL will likely be different from the one shown below:
cd ~
wget http://nodejs.org/dist/v0.10.33/node-v0.10.33.tar.gz
Once the file has been download, extract the archive using the tar command:
tar xzvf node-v*
This will create the directory structure that contains the source code. Move into the new directory:
cd node-v*
Since we already installed all of the Node dependencies using apt in the last section, we can begin building the software right away. Configure and build the software using these commands:
./configure
make
Once the software is compiled, we can install it onto our system by typing:
sudo make install
Node is now installed on our system (along with some helper apps). Before we continue, we can get rid of both the source code archive and the source directory to keep our system clean:
cd ~
rm -rf ~/node-v*

Install the Rest of the Components with NPM, Git, and Bower

Now that we have Node installed, we have access to the npm package manager, which we can use to install some of the other software we require.
MEAN.JS uses a separate package manager, called bower, to manage front-end application packages. It also uses the Grunt Task Runner to automate common tasks. Since these are management packages that should be available to assist us with every app we create, we should tell npm that we need these globally installed:
sudo npm install -g bower grunt-cli
Now, we finally have all of the prerequisite packages installed. We can move onto installing the actual MEAN.JS boilerplate used to create applications. We will clone the official GitHub repository into a directory at /opt/mean in order to get the most up-to-date version of the project:
sudo git clone https://github.com/meanjs/mean.git /opt/mean
Enter the directory and tell npm to install all of the packages the project references. We need to use sudosince we are in a system directory:
cd /opt/mean
sudo npm install
Finally, since we are operating in a system directory, we need to call bower with sudo and the --allow-root option in order to install and configure our front-end packages:
sudo bower --allow-root --config.interactive=false install

See the Results

MEAN.JS is now completely installed. We can start up the sample application using the Grunt Task Runner within our project directory. This will run the application and allow it to begin accepting requests:
cd /opt/mean
grunt
Once the process starts, you can visit your server's domain name or IP address in your web browser on port "3000":
http://server_domain_or_IP:3000
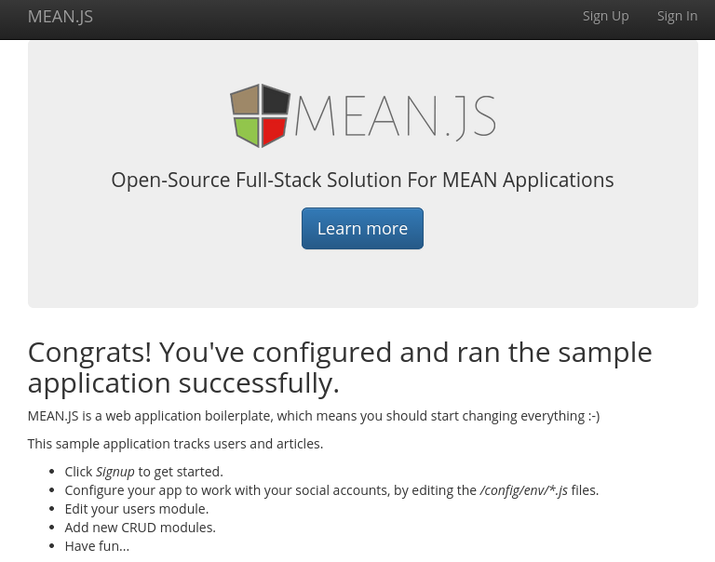
You should see the sample MEAN.JS application:
MEAN.JS sample application

Conclusion

Now that you have the necessary components and the MEAN.JS boilerplate, you can begin making and deploying your own apps. Check out the documentation on MEAN.JS website for specific help on working with MEAN.JS.